Tesla M40 vGPU Proxmox 7.1
IMPORTANT
This guide is for the 24GB verison of the Tesla M40 to override the default vGPU profiles to run 3x 8GB vGPUS
(This can also be used with the 12GB version just adjust the framebuffer accordingly)
Setup/Requirements
Host: Proxmox 7.1-10
Kernel: 5.13.19-2-pve
Driver (Host): NVIDIA-Linux-x86_64-510.47.03-vgpu-kvm.run from NVIDIA portal
Driver (Guest): 511.79-quadro-rtx-desktop-notebook-win10-win11-64bit-international-dch-whql Direct from NVIDIA driver download
Profile: nvidia-18 [framebuffer overridden to 8053063680 (8Gb) using vgpu_unlock-rs]
Software: Parsec & VB Cable for audio
Instructions
Download the Host driver from the NVIDIA licensing portal then configure the driver following the below instructions.

Installation - vGPU Unlock
Install Dependencies
|
-NOTE- Recommend downloading on another system and transferring vgpu_unlock to Proxmox via SCP. Failed through GIT, successful when SCP’d. Makes no sense, I know.
If your Kernel isn’t already 5.13.19-** (You can check by doing uname -a example output below ) you can install one using apt install pve-headers-5.13.19-*-pve && apt install pve-kernel-5.13.19.*-pve

|
CONFIGURE IOMMU
|
Save file and close then update-grub
Load VFIO modules on boot
|
Save file and close
|
Verify IOMMU Enabled
|
INSTALL NVIDIA + VGPU_UNLOCK
|
In the file nano /usr/src/nvidia-510.47.03/nvidia/os-interface.c add the line #include "/root/vgpu_unlock/vgpu_unlock_hooks.c" after #include "nv-time.h" so that it looks like the following
|
Then add ldflags-y += -T /root/vgpu_unlock/kern.ld to the end of the file nano /usr/src/nvidia-510.47.03/nvidia/nvidia.Kbuild Then save and quit and run
|
|
And lastly
|
MDEVCTL Configuration
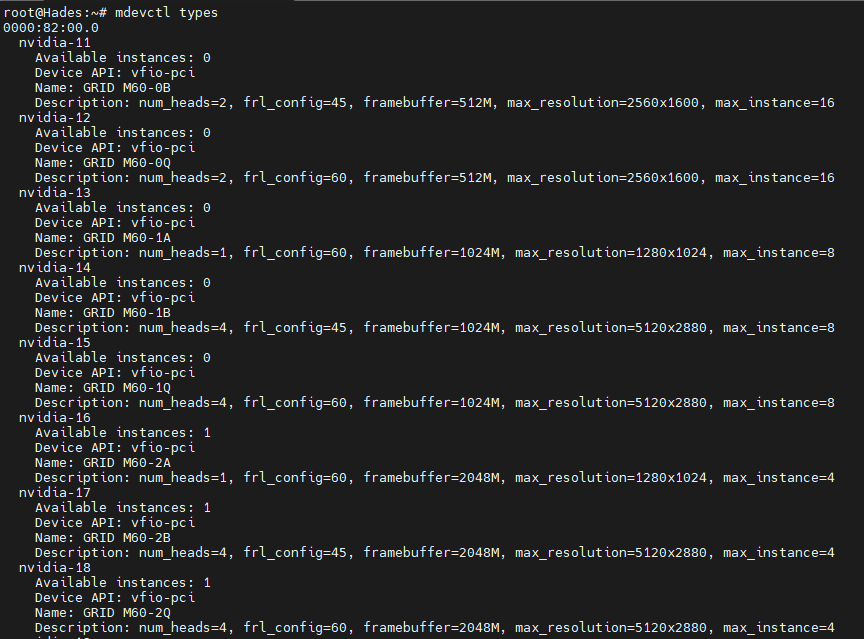
When you log back in run mdevctl types and you should see something along the lines of the below

Determine which vGPU Profile you’d like to use. Make note of the profile identifier at the top. In the above example, that is “nvidia-18”.
Generate UUIDs for each vGPU you want to create. I used https://uuidgenerator.net, as it allows you to generate as many UUIDs as you’d like, and download them in a text file. This allows for easy scripting in the next step.
vGPU Rust Unlock
Clone vgpu_unlock-rs and run to download and install rust
|
Then run source $HOME/.cargo/env to reconfigure your shell. Then cd vgpu_unlock-rs and run cargo build --release
Create the requried directories
|
Then create the following files
|
with the following:
|
Create the profile override using:
|
and populate with the below: (for 8gb vGPU’s)
|
MDEVCTL Configuration
Take one of the uuid’s you generated earlier and use it in this command (repeat as many times as VM’s you want) where the PCI address can be found by using nvidia-smi

|
Setup a Windows VM in the GUI making sure to set cpu to host and disabling balloning in the memory options, once done modify VM config at the following location and add the below nano /etc/pve/qemu-server/###.conf Or if part of a cluster nano /etc/pve/nodes/[Node]/qemu-server/###.conf replacing [UUID] with your generated one
|
Install the Windows VM as per normal, Once at the desktop install the NVIDIA driver for a Quadro M6000
Install Parsec as a service and login before shutting down the VM.
Once done modify your VM’s settings either by using the GUI and setting the display to none or via the command line by adding vga: none in the config

Important notes
- Once configured modify the Windows power plan to not put the computer to sleep or turn off the display else the VM will suspend and parsec won’t connect
- If you can’t get all three VM’s to boot on the host run
nvidia-smi -e 0to disable ECC memory to allow more VRAM for the VM - If you wish to change to 2 or 4 VM’s modify the
profile_override.tomlto be 5.5Gb or 11.5Gb in bytes Handy Link6gb = 5905580032
8gb = 8053063680
12gb = 12348030976
Copyright: Unless otherwise stated, all articles on this blog are licensed under the CC BY-NC 4.0 license agreement. Please reference the source for reprinting ZemaToxic's!